This tutorial talks about how to create your flutter project and run it to your android or iOS device. If you have not done environment setup then visit our Flutter Environment Setup.
First ensure that you have installed Dart and Flutter plugins in your IDE or not.
Install Dart and Flutter Plugins/Extensions
First open your preferred IDE.
In welcome screen, click on Configure > Plugins.
Then in Plugins window, Click on Browse repositories, search the Dart and Flutter plugins to install.
We will create and run flutter project based on our choice of our development tools.
- Android Studio/IntelliJ Idea
- VS Code
- Terminal & Editor
Create a flutter project
Create project In Android Studio or IntelliJ IDEA
To create an app in android studio or intellij open the IDE and in welcome screen click on Create new project.
In the next screen, you will find out list of packages like Java, Android, Maven, Gradle, Dart, Flutter, Kotlin etc.
Then select Flutter package and provide the Flutter SDK path. Then select Next.
In next screen, select Project Name as per your choice and Project location at your preferred location in the disk.
Select other important details like Organization, your preferred Android Language and iOS Language as well.
Then click on Finish to create new flutter project.
Create project In VS Code
Open VS Code IDE, select View > Command Pallete (Ctrl + Shift + P).
Type Flutter and select the Flutter:New Project.
Enter project name of your choice and press Enter.
Then select the preferred location for saving your project in the disk.
Wait till proect creation completes.
Create project using Terminal
Open terminal and move to the folder or directory in the disk where you want to create your project.
Then use flutter create command to create your flutter project.
flutter create myapp
In above command, myapp will be the name of your flutter project.
After creating your flutter project in your desired IDE you will need to run your app.
Run flutter app
Run in android studio / intellij
Locate the Toolbar in android stuydio or intellij.
You can select your device in which you want to run from Target Selector option in toolbar. Toolbar also have other useful features like Run, Debug, Hot Reload, Attach and Stop to support run and test functions in your app.
If there is no devices listed, then create one from Tools > Android > AVD Manager.
Now, click on Run icon in the toolbar to run your flutter app.
Run in VS Code
Locate the VS Code status bar (the blue bar at the bottom of IDE).
Select a device from Device Selector area.
Then select Debug > Start Debugging or press F5 to run your flutter app.
Run app using terminal
Run your flutter app using command,
flutter run
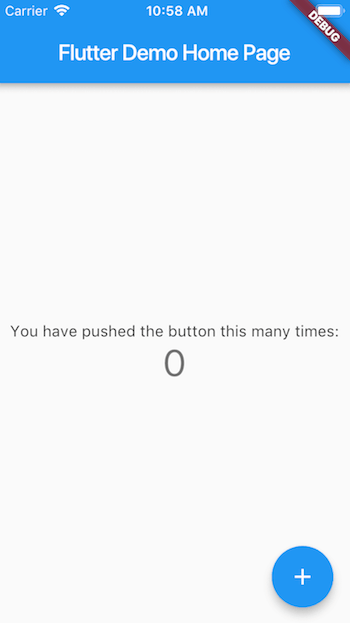
After your app build gets completed, You’ll find the starter hello world flutter application running in your device as below.

Also, your project will have core folder/package structure as below with all the projects you create.
Flutter-app/
.idea
android
ios
lib
test
Other important files like .gitignore, .metadata, .packages, pubspec.lock, pubspec.yaml
The package for coding your flutter application will be lib package. Lib package will have a main.dart file from where your flutter application execution starts.
In further tutorials, we will deeply understand about the project structure and syntax structure for flutter development.
For now, let’s take a look at how you can use hot reload feature in flutter framework.
Hot Reload
To use hot reload feature in app, your app must be open at the same time.
Ctrl + S is the command to hot reload your app.
With this instructions, you’re done for the basic flutter set up. Still if you find any issues comment down your questions and suggestions or visit the official documentation.
Our next tutorial is about the flutter project structure which explains how flutter directories and packages are organised and used in flutter project. So stay tuned with us for reading more interesting flutter tutorials.
Feel free to ask your questions in the comment section. Keep reading and commenting your suggestions to make toastguyz a better site to learn different programming languages.


Good tutorial
Thanks.