Categories
Flutter

Read and write files in flutter

I think this is one of the crucial and most important functionalities to read and write a file. Flutter also supports reading and writing files programmatically. You can use this tutorial as a reference to read and write any kind of text, doc, json or any other file types.

For this tutorial we are gonna cover following contents

  • Read files from the assets
  • Read files from your android or ios devices
  • Write files from your android or ios devices

So some of you might think how to write files at assets folder. But, at the moment I’m writing this content I didn’t found any suitable way to do so from official flutter docs. I will keep checking this functionality and will update as soon as it will be available from official flutter docs.

First thing first, for implementing this file manipulating feature we are gonna use a third party package Path_Provider to access commonly used file locations on the file system.

Path_Provider is required only if you want to read and write files to your android/ios device locations.

Now, let’s get started with reading and writing files to your flutter projects.

Read files from the assets

To read files from assets you have to create or add your file(whether it is txt, doc, json etc.) in to assets folder. So first create a folder named “assets” inside your root project folder. Then create or add your file. For our sample I’m creating a file named “Toastguyz.txt” with some text inside it.

To access any files from assets in flutter, you need to register them inside pubspec.yaml file.

Pubspec.yaml file

assets:
  – assets/Toastguyz.txt

To access any files from assets in flutter, you need to register them inside pubspec.yaml file.

readFilesFromAssets() async {
  // Users can load any kind of files like txt, doc or json files as well
  String assetContent = await rootBundle.loadString('assets/Toastguyz.txt');

  print("assetContent : ${assetContent}");
}

You will need to use services dependency/APIs to use rootBundle related features.

import ‘package:flutter/services.dart’;

For our user case, I have accessed a text file using above method. You can also use other file types like doc, json and many more.

That’s it for read and write files from assets.

Read files from your android or ios devices

To read files from your custom android or ios location, you must have a file at that location. So, we will first create a file at some custom location in our android/ios devices and then we will try to read data from that file.

So to access custom file system location we will use a third party package called Path_Provider. It will help us to easily access file locations as per our requirements.

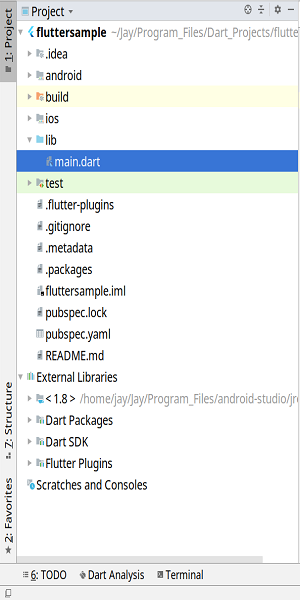
In our main.dart file, I have created a Home class inside which I have added a button to read files from android or ios device locations. Following is the method I have added to read files from custom device locations.

readFilesFromCustomDevicePath() async {
  // Retrieve "External Storage Directory" for Android and "NSApplicationSupportDirectory" for iOS
  Directory directory = Platform.isAndroid
      ? await getExternalStorageDirectory()
      : await getApplicationSupportDirectory();

  // Create a new file. You can create any kind of file like txt, doc , json etc.
  File file = await File("${directory.path}/Toastguyz.json").create();

  // Read the file content
  String fileContent = await file.readAsString();
  print("fileContent : ${fileContent}");
}

So for creating a file location I have used methods getExternalStorageDirectory() for android platform and getApplicationSupportDirectory() for ios platform to use recommended File locations for android and ios respectively.

We will use Path_Provider dependency/APIs for accessing file locations. Also, to check whether device platform is android or ios we will use io APIs. File manipulation related features also require io APIs.

import ‘dart:io’;
import ‘package:path_provider/path_provider.dart’;

We have created here a new json file “Toastguyz.json” using File.create() method. Then to read the content of the file we have an async method file.readAsString() which gives us the result of a file content as a String value.

This will give you the expected output as per our requirements.

Write files from your android or ios devices

To write files at your custom android or ios location, you must have a file at that location. So, we will first create a file at some custom location in our android/ios devices and then we will try to write data in to that file.

To access custom file system location we will use a third party package called Path_Provider.

In our main.dart file, I have created a Home class inside which I have added a button to write files at android or ios device locations. Following is the method I have added to write files to custom device locations.

writeFilesToCustomDevicePath() async {
  // Retrieve "External Storage Directory" for Android and "NSApplicationSupportDirectory" for iOS
  Directory directory = Platform.isAndroid
      ? await getExternalStorageDirectory()
      : await getApplicationSupportDirectory();

  // Create a new file. You can create any kind of file like txt, doc , json etc.
  File file = await File("${directory.path}/Toastguyz.json").create();

  // Convert json object to String data using json.encode() method
String fileContent=json.encode({
  "Website": {
    "Name": "Toastguyz",
    "Description": "Programming Tutorials",
  },
});

// You can write to file using writeAsString. This method takes string argument
// To write to text file we can use like file.writeAsString("Toastguyz file content");
return await file.writeAsString(fileContent);
}

So for creating a file location I have used methods getExternalStorageDirectory() for android platform and getApplicationSupportDirectory() for ios platform to use recommended File locations for android and ios respectively.

We will use Path_Provider dependency/APIs for accessing file locations and io APIs to check device platform device and perform File related operations.

import ‘dart:io’;
import ‘package:path_provider/path_provider.dart’;

We have created here a new json file “Toastguyz.json” using File.create() method. Then to write content in file we have an async method file.writeAsString() which takes String argument/parameter to write in to the file.

So to create json object as a String value will use json.encode() method as shown in the method. Then we will pass converted resultant String to our file.writeAsString()

You can also create any doc, txt or other file type and write according content in to it as per your requirements.

Now, we’re done with writing files to custom device location.

Feel free to ask your questions in the  comment section. Keep reading and commenting your suggestions to make toastguyz a better site to learn different programming languages.

Categories
Flutter

Flutter Widgets

Widgets are the reason why flutter, Google’s UI toolkit is unique and more elegant in many ways than other hybrid frameworks.

As per official documentation,

“Each and everything in flutter is Widget.”

In flutter, all the UI components or elements through which users can communicate are flutter widgets.

Widgets are built to design your flutter applications in most elegant and smoother way. Whatever the application UI a user can see and interact is thankful to flutter widgets.

Basically, widgets are used to build and describe the UI elements of a flutter application.

Flutter widgets are equivalent to Android Views, iOS UI Controllers, React Native Components and Ionic Controllers.

In flutter, Widgets are not just UI elements. Flutter widgets can update child elements, respond to user interaction, manage app state, act on lifecycle method events and so on.

Flutter has a wide range of cool widgets like, Text, AppBar, RaisedButton, IconButton, PageView, CircularProgressIndicator and many more.

In flutter, there are two types of widgets

  • Stateless Widget
  • Stateful Widget

Before, learning about stateful and stateless widgets. Let’s take a look on State

State

According to official documentation,

State is whatever data you need in order to rebuild your UI at any moment in time while your app is running.

State is the structural representation of your UI which keeps track of app’s assets, all the variables on which screen UI depends, fonts, textures, animation state and so on.

Now, you we have idea about state we can move to the introduction of stateless and stateful widgets.

Stateless Widget

A widget which can’t change/mutate it’s state is known as Stateless Widget.

A stateless widget never changes/redraw its UI. Icon, Text, IconButton are examples of Stateless Widget.

Syntax of a Stateless Widget

import ‘package:flutter/material.dart’
class StatelessSample extends StatelessWidget {
  final String title;
  StatelessSample(this.title);
  
  @override
  Widget build(BuildContext context) {
    // Your Stateless Widget UI Goes Here
    return Scaffold(body: Center(child: Text("Stateless Widget")));
  }
}

Every stateless widget has a build method for drawing/rendering their widget UI. Stateless widget can also have a constructor method to get the parameters from parent widgets.

We use Stateless widgets to display static content.

To create a Stateless widget, you need to extend your class from Stateless Widget.

We need to use material.dart APIs to use built-in material design widgets in flutter.

We will learn more about stateless widget lifecycle methods and flutter syntax in upcoming tutorials.

Stateful Widget

A widget which can change/mutate it’s state is known as Stateful Widget.

Stateful widget can redraw it’s UI using a built-in setState() method for a stateful widget.

It has more complex lifecycle methods than stateless widgets as stateful widget’s state can be modified.

To create a Stateful widget you will need to create two classes.

  1. A Stateful class – creates state of the stateful widget
  2. A State class – updates UI of the stateful class based on state changes

A Stateful class should be extended from a StatefulWidget class.

class StatefulSample extends StatefulWidget {
}

A stateful class must implement createState() method.

@override
StatefulSampleState createState() => StatefulSampleState();

createState() method will need the reference of a new corresponding State class which keeps track of state of the stateful class.

// keeps track of state of StatefulSample class
class StatefulSampleState extends State {

}

Obviously, a build method is required to draw the UI of the widget. But, all the methods will take place in the state class instead of stateful class.

In this way if the state of the widget changes then Build method gets called again and re-renders the widget with updated state properties.

class StatefulSampleState extends State {
@override
Widget build(BuildContext context) {
return Container();
}
}

To change the state of the stateful widget, flutter provides built-in setState() method.

Syntax of a Stateful Widget

class StatefulSample extends StatefulWidget {
  final String title;
  StatefulSample(this.title);

  @override
  StatefulSampleState createState() => StatefulSampleState();
}

class StatefulSampleState extends State<StatefulSample> {
  @override
  Widget build(BuildContext context) {
    return Scaffold(
      body: Center(
        child: RaisedButton(
          child: Text(widget.title),
          onPressed: () {
            setState(() {
              // Calling setState() method will update the state of the UI and re-render the widget
            });
          },
        ),
      ),
    );
  }
}

A Stateful widget can also have a constructor in its stateful class. We can access properties and methods of a stateful class to its corresponding state class using widget variable.

Note :

“widget” variable can be accessed from methods only in state class.

For ex :

for accessing title property of a stateful class to corresponding state class inside build method using widget.title

So whenever we require dynamic content in widget which might change over time we should use Stateful widget.

Also, we will learn more about stateful widget lifecycle methods and flutter syntax in upcoming tutorials.

So this was the brief introduction on flutter widgets and its types.

Feel free to ask your questions in the comment section. Keep reading and commenting your suggestions to make toastguyz a better site to learn different programming languages.

Categories
Flutter

Project structure in flutter

I have decided to write the flutter project structure for developers who have not been used to android or iOS package structure or even for beginners who want to be familiar with the flutter environement.

In last tutorial, we have learned to create and run your flutter project. Yet, if you don’t know about it please visit our flutter proect creation and deployment tutorial.

Before explaining flutter project structure i am going to introduce an important tools in flutter known as Pub.

Pub

Pub is the package manager for the dart programming language containing libraries and packages for flutter.

Pub is the package management tool which has list of commands for configuring, debugging, testing and managing your flutter project.

So initially when you create any flutter project you will find out the flutter project/package structure as below :

We are going to discuss all the important packages and files listed in your project structure as above.

Initially you will see two main packages. One is your Project Root Package (In above image, fluttersample) and other one is External Libraries.

Project Root Package

Project package will contain all the packages and files related to your flutter coding, testing and maintenance.

.idea

.idea package contains project configuration settings like dart sdk, flutter plugins, project workspace and many more. All the configuration files will be stored in xml file forms. Generally, you will never need to approach this package.

android

android package will contain all the packages and files related to your native android app. If you’ve ever worked with android platform you will find this package familiar. Whenever you want to implement any android specific feature you have to work with this package directories.

In android, AndroidManifest.xml is the core file containing all the essential information about configuration details of your android app.

ios

Similar to android package, ios package will also contain all the packages and files related to your native ios app. Whenever you want to implement any native ios specific feature you have to work in this package directories.

In ios, Info.plist is the core file containing all the essential information about configuration details of your ios app.

lib

This is our main flutter package in which we have to write our flutter code. By default, when you create a project you will find out a main.dart file in your lib folder. So, this main.dart file will have a main function from where your flutter app execution starts.

Also, lib is the package in which you are going to create and write all the dart files (as flutter uses dart as its development language) containing your app source code.

By default, main.dart file will have some code written in it (you can say this a flutter’s hello world application). So that you can test and run something you can interact in your flutter app.

Test

This package will contain files for writing and running software tests to ensure that your flutter app is working correctly before release. By default, it will contain a dart file named as widget_test.dart for software testing.

.flutter-plugins

This file lists the information about third party packages you uses in your flutter project.

.gitignore

As name suggests, this hidden file stores lists of different files which you don’t want to upload to your git system while pulling or pushing your source code to git system.

.metadata

.metadata file contains the information about the flutter properties like stable sdk channel, project type etc.

.packages

.packages file contains information about all the dart packages included inside the external libraries in your flutter project.

<appname.iml>

This file contains configuration information about the packages and modules used by the IDE.

pubspec.lock

This file conatins detailed information(like, dependency name, description, meta, source, version and many more information) about all the dart packages included in your flutter project.

pubspec.yaml

pubspec.yaml is an essential file containing all the flutter project related information like project name, project details, sdk version details, third packages or dependencies used in the project, assets(like images, files, fonts) you want to use in your project etc.

README.md

This is an option file provided for developer reference. Any developer can add different kinds of information about flutter project so that other developers can read and understand it. This file is like comments in program or say explanatory documentation about flutter project.

Okay, so we have done our part o understanding the flutter project structure. You will get used to this project structure. So, don’t worry and get going through our tutorials.

Our next tutorial is flutter widgets covering what widget is and how they works to build your app UI.

If you find out our flutter tutorials then share it with your friends and comment down your suggestions to help us in making our tutorials more interesting for other users.

Feel free to ask your questions in the comment section. Keep reading and commenting your suggestions to make toastguyz a better site to learn different programming languages.

Categories
Flutter

Create and run flutter project

This tutorial talks about how to create your flutter project and run it to your android or iOS device. If you have not done environment setup then visit our Flutter Environment Setup.

First ensure that you have installed Dart and Flutter plugins in your IDE or not.

Install Dart and Flutter Plugins/Extensions

First open your preferred IDE.

In welcome screen, click on Configure > Plugins.

Then in Plugins window, Click on Browse repositories, search the Dart and Flutter plugins to install.

We will create and run flutter project based on our choice of our development tools.

  1. Android Studio/IntelliJ Idea
  2. VS Code
  3. Terminal & Editor

Create a flutter project

Create project In Android Studio or IntelliJ IDEA

To create an app in android studio or intellij open the IDE and in welcome screen click on Create new project.

In the next screen, you will find out list of packages like Java, Android, Maven, Gradle, Dart, Flutter, Kotlin etc.

Then select Flutter package and provide the Flutter SDK path. Then select Next.

In next screen, select Project Name as per your choice and Project location at your preferred location in the disk.

Select other important details like Organization, your preferred Android Language and iOS Language as well.

Then click on Finish to create new flutter project.

Create project In VS Code

Open VS Code IDE, select View > Command Pallete (Ctrl + Shift + P).

Type Flutter and select the Flutter:New Project.

Enter project name of your choice and press Enter.

Then select the preferred location for saving your project in the disk.

Wait till proect creation completes.

Create project using Terminal

Open terminal and move to the folder or directory in the disk where you want to create your project.

Then use flutter create command to create your flutter project.

flutter create myapp

In above command, myapp will be the name of your flutter project.

After creating your flutter project in your desired IDE you will need to run your app.

Run flutter app

Run in android studio / intellij

Locate the Toolbar in android stuydio or intellij.

You can select your device in which you want to run from Target Selector option in toolbar. Toolbar also have other useful features like Run, Debug, Hot Reload, Attach and Stop to support run and test functions in your app.

If there is no devices listed, then create one from Tools > Android > AVD Manager.

Now, click on Run icon in the toolbar to run your flutter app.

Run in VS Code

Locate the VS Code status bar (the blue bar at the bottom of IDE).

Select a device from Device Selector area.

Then select Debug > Start Debugging or press F5 to run your flutter app.

Run app using terminal

Run your flutter app using command,

flutter run

After your app build gets completed, You’ll find the starter hello world flutter application running in your device as below.

Also, your project will have core folder/package structure as below with all the projects you create.

Flutter-app/
.idea
android
ios
lib
test
Other important files like .gitignore, .metadata, .packages, pubspec.lock, pubspec.yaml

The package for coding your flutter application will be lib package. Lib package will have a main.dart file from where your flutter application execution starts.

In further tutorials, we will deeply understand about the project structure and syntax structure for flutter development.

For now, let’s take a look at how you can use hot reload feature in flutter framework.

Hot Reload

To use hot reload feature in app, your app must be open at the same time.

Ctrl + S is the command to hot reload your app.

With this instructions, you’re done for the basic flutter set up. Still if you find any issues comment down your questions and suggestions or visit the official documentation.

Our next tutorial is about the flutter project structure which explains how flutter directories and packages are organised and used in flutter project. So stay tuned with us for reading more interesting flutter tutorials.

Feel free to ask your questions in the comment section. Keep reading and commenting your suggestions to make toastguyz a better site to learn different programming languages.

Categories
Flutter

Flutter Environment Setup

I think now you are in love with flutter and want to take part in this flutter journey.

Before starting your flutter development you will need to install some tools and editors or IDEs to run and test your flutter codes and applications.

Let’s get started with the flutter environment setup based on different operating systems.

  • Flutter for Windows
  • Flutter for Mac
  • Flutter for Linux

We have referred official flutter documentation for setting up the flutter environment setup. We have tried to gather all the OS specific install and setup procedure at one place. Still if you find any issue comment down and we are here to help you as soon as possible.

To setup flutter environment we need to download and configure Flutter SDK (Software development kit) which is set of tools or libraries required for creating applications for android and iOS platforms.

I will try to explain each and every possible aspect for setting up required tools and IDEs for flutter development. But, still if you find any issue please comment down your questions and we will try to help you as soon as possible.

To download and setup flutter SDK for different operating systems visit the official website and download the flutter SDK version for windows, mac or linux OS respectively.

Flutter for Windows

For windows, extract the downloaded zip file for SDK and find the “flutter” named folder inside it and place it to desired location for further configuration.

Update environment variables

To run flutter commands in terminal in general, you have to set-up environment variables in windows.

From the start menu search bar, type ‘env’ and select Edit environment variables.

Inside User variables check if there is an entry named as Path

If the Path entry exists, add the full path to flutter SDK till flutter\bin; using “;” as a separator after existing values.

If the Path entry does not exist, create a new user variable named Path with the full path to flutter SDK till flutter\bin; as its value.

Still if you find any issue in setting up flutter SDK visit the official website

Flutter for Linux

For linux, extract the downloaded file for SDK and find the “flutter” named folder inside it and place it to desired location for further configuration.

Update flutter path

To run flutter commands in terminal in general, you have to add flutter tools to your path in Linux.
 export PATH=”$PATH:`pwd`/flutter/bin”

Still if you find any issue in setting up flutter SDK visit official website

Flutter for Mac

For Mac, extract the downloaded zip file for SDK and find the “flutter” named folder inside it and place it to desired location for further configuration.

Update flutter path

To run flutter commands in terminal in general, yo have to add flutter tools to your path in Mac.
 export PATH=”$PATH:`pwd`/flutter/bin”

Still if you find any issue in setting up flutter SDK visit official website

Run Flutter Doctor

After SDK Setup, to check if everything is okay run flutter doctor command in terminal. You can also checkout if anything is missing to set up flutter framework in your machine using the following command,

flutter doctor

If everything is working fine then we have to work on android and iOS setup to run our flutter project.

Android Setup For Running Flutter Apps

Flutter depends on full installation of Android Studio to use its platform dependencies. However, we can use another IDEs for flutter coding.

First download and install Android Studio from official website

Start android studio and go through the installation wizard and download and setup all the tools required for android platform setup like Android SDK, Android SDK Platform-Tools, and Android SDK Build-Tools etc.

For setting up any IDE (like Android Studio, Intellij IDEA etc) for your flutter coding you have to install dart and flutter plugins.

Install Dart and Flutter Plugins

First open your preferred IDE.

In welcome screen, click on Configure > Plugins.

Then in plugins window, click on Browse repositories, search the Dart and Flutter plugins to install.

Restart IDE after installing plugins and you’re done.

To run flutter app on android either you require to setup android emulator or to setup real android device.

Setup Android Emulator

In Android Studio, go to Tools > Android > AVD Manager > Create Virtual Device.

Choose a device configuration as per your requirements and select Next.

Select at least one system image for running your emulator for any of the android versions like Nougat, Oreo, Pie etc.

Under emulated performance, select Hardware – GLES 2.0 to enable hardware acceleration.

Verify the AVD configurations and click on Finish.

Now, your emulator is ready to run. Click Run in the toolbar and select the device emulator to run your app. It will display your app running on android emulator device with selected OS version and configurations.

Setup Android Device

Enable Developer Options and USB Debugging on your device.

Install the Google USB Driver (for windows user only).

Plug in your real device in to your machine with USB cable. If any dialog appears for machine authorisation authenticate it to access your device to run your app.

To check out if flutter has recognised any devices or not run “flutter devices” command in terminal. It will list out all the connected devices to your machine.

Select run option in toolbar to run flutter app in your real android device.

Still if you find any issue in setting up android setup visit the link here for respective OS
For Windows visit official website
For Linux visit official website
For Mac visit official website

iOS Setup

You cannot install XCode IDE (iOS app development IDE) other than Mac. Ultimately, it’s not possible to run your ios app in windows. Therefore, you will require a mac OS installed in your machine to build and run ios apps.

So to build and run flutter apps for iOS, you will need a mac OS with Xcode 9.0 and higher.

Install Xcode

Download and Install Xcode IDE from official website or Mac App Store

To run flutter app on ios either you require to setup iOS simulator or deploy to real iOS device.

Setup iOS Simulator

On your Mac, open simulator by using the following command.
open -a Simulator

Ensure that your simulator is using a 64-bit phone (i.e., iPhone 5s or later) by checking the settings in the simulator’s Hardware > Device menu.

Depending on your computer’s screen size, high-screen-density iOS simulator might overflow your screen. Set the device scale under the Window > Scale menu in the iOS simulator.

Run/Deploy app to iOS devices

To run your flutter app to a real device you’ll need an apple account and some additional tools.

Install homebrew from official website

Install additional tools for running flutter apps to iOS device by running the following commands.

brew install –HEAD usbmuxd
brew link usbmuxd
brew install –HEAD libimobiledevice
brew install ideviceinstaller ios-deploy cocoapods
pod setup

Complete signing flow to configure your project.

Open the default Xcode workspace in your project.

In Xcode, select the Runner project in the naviagtion panel.

In the Runner target settings page, selct your Development Team under General > Signing > Team. After selecting a development team, Xcode creates and downloads a Development Certificate then it registers your device with your account. At last it creates and downloads a provisioning profile (if required).

To start your iOS development project in Xcode, you need to sign in with your apple ID.

Remember that development and testing is supported for any apple ID.

While you attach a physical iOS device to run your app, you will need to trust both your Mac and the Development Certificate on that device. Select Trust in the dialog appear while connect your iOS device for the first time.

Then go to the Settings app in your device to select General > Device Management to trust your development certificate.

If automatic signing fails in Xcode, then verify project’s General > Identity > Bundle Identifier value is unique.

Now, you’re done to run your flutter app in your iOS device.

So in upcoming tutorials, we will also learn how to create a flutter project and how to run flutter app in your android and iOS device.

Below is the list of popular IDEs which you can use for flutter app development.

My personal suggestion for developers coming from the app development background is Android Studio or Xcode or Intellij IDEA and for developers coming from the web background is VS code.

I have tried to explain environment setup for flutter development, still if you find any issues then comment down your questions and suggestions to make our tutorials more readable and efficient for other users.

Feel free to ask your questions in the comment section. Keep reading and commenting your suggestions to make toastguyz a better site to learn different programming languages.

Categories
Dart

Dart Libraries

What is Dart Library ?

A Library in any programming language is a set of code which was pre-written by any developer so that others can use them in their own programs just by importing them in program.

Libraries are collection of functions, variables, typedefs, constructors, classes and many more concepts to develop some useful code reusable to any developers just by adding some reference points which is library imports.

Libraries are used to reuse the code so that people do not have to write the set of codes which are frequently used.

For ex :

Print() method is function written in dart:core library so that for displaying a data we don’t need to write that code every time. You just have to import specific library whose functions or classes you want to use.

What is Library Import ?

Importing a library makes that particular set of code(which may contain different functions, classes, variable and typedef etc.) which we want to use in our current program accessible to the user.

We can import multiple library at a time in the program.

Every programming languages have therir own set of predefined libraries which helps users to save their time and efficiency.

Dart also have some libraries which makes our coding more easier.Some of them are :

dart:core

Built-in types, collections, and other core functionality. This library is automatically imported into every Dart program.

dart:async

Support for asynchronous programming, with classes such as Future and Stream.

dart:math

Mathematical constants and functions, plus a random number generator.

dart:convert

Encoders and decoders for converting between different data representations, including JSON and UTF-8.

dart:html

DOM and other APIs for browser-based apps.

dart:io

I/O for programs that can use the Dart VM, including Flutter apps, servers, and command-line scripts.

To import any library in the dart “import” keyword is used.

The only required argument to import any library is a URI(Uniform Resource Identifier- is the locator of the library resource in project) specifying the library.

For built-in libraries, URI syntax for importing library is as below :

// libraryName is the Name of the predefined dart library.
import ‘dart:libraryName’;

For custom libraries(which can be created by any random user), URI syntax for importing library is as below :

// where test/test.dart is URI of the custom library.
import ‘package:test/test.dart’;

For better experiencing the use of custom libraries create two dart files. Let say one is test.dart and other is PoliticiansTest.dart

create Test.dart file and copy below code in that file to test.

// so here to use PoliticiansTest class which is located inside the PoliticiansTest.dart file, we have to import that PoliticiansTest.dart library.
import 'package:DartSample/PoliticiansTest.dart';
void main(){
  PoliticiansTest politiciansTest=new PoliticiansTest();
  politiciansTest.politicianFromTheCountry("N. Modi", "India");
  politiciansTest.politicianFromTheCountry("B. Obama", "USA");
  politiciansTest.politicianFromTheCountry("N. Mandela", "Africa");
}
-Create PoliticiansTest.dart file and copy below code in that file to test. 
class PoliticiansTest{
  politicianFromTheCountry(String name,String country){
    print("$name is politician from the country $country");
  }
}

Output :

N. Modi is politician from the country India
B. Obama is politician from the country USA
N. Mandela is politician from the country Africa

Similarly, you can also provide prefix for libraries to simplify the library import or distniguish the component when there are two libraries having same method or class etc.

as keyword is used for providing prefix to the library imported.

Create Library1.dart file and copy below code in that file to test.

testLibrary(){
print(“Testing Library First”);
}

Create Library2.dart file and copy below code in that file to test.

testLibrary(){
print(“Testing Library Second”);
}

Create test.dart file and copy below code in that file to test.

// prefixing lib1.dart with lib2 using as keyword
import 'package:DartSample/Library1.dart' as lib1;
import 'package:DartSample/Library2.dart' as lib2;
void main(){
	lib1.testLibrary();
	lib2.testLibrary();
}

Output :

Testing Library First
Testing Library Second

By prefixing any library we can access class , variables and methods with prefix. In above example, we have added prefix to the library1.dart as lib1. Now we can access any class, variables and methods from the library1.dart using that prefix like testLibrary() method from the library.

Therefore Library is a great way for code reusability in any manner to improve the programming efficiency. Hence, results in greater productivity.

Feel free to ask your questions in the comment section. Keep reading and commenting your suggestions to make toastguyz a better site to learn different programming languages.

Categories
Dart

Dart Generics

In dart programming, all the collections(for ex: list,map, set etc.) are heterogeneous nature by default.

heterogeneous nature means collections can have values of different data types.

For ex :

void main(){
// this heterogeneous list is not defined with specific type. So we can add values of any data type like String, int, boolean etc.
	var list=List();
	list.add("red");
	list.add(1);
	list.add(true);
}

We can also have homogeneous collections by defining specific type for the collection.

Homogeneous collection means it can have the values of same data type we have specified while declaring the collection.

For ex :

void main(){
// this list is defined with specific data type “String”. So we can’t add values other than String data types.
	var list=List<String>();
	list.add("red");
	list.add(“green);
	list.add(“blue);
}

Heterogeneous Structure(either it is collections, methhods etc.) can be used when you just want to store values of any data type. While, homogeneous collections are used for storing , retriving and manipulating the data of the same type. it’s very tough for hetrogeneous structures to manipulate the data easily. As they can be of any data type.

For ex :

void main(){
	var list=List();
	list.add("red");
	list.add("green");
// value is of int type
	list.add(1);
	
	for(int i=0;i<list.length;i++){
		//we’ll get an error when i equals to 2 as the value at the index 2 is not of the 		String data type.
    		String value=list[i];
		print(value);
	} 
}

Above example, can be solved either storing the each value of list to the variable of that particular data type or type casting while retrieving data. Which is not a proper solution.

A better solution is to use homogeneous collection or methods instead.

Generics are also used for achieving the same i.e.,we are manipulating and storing the values of the same data type. Which is also known as type safety.

What is generics ?

Generics are used to ensure that the Objects or functions we manipulate are of the same data type or say type safe to use.

we can’t hold objects of different types while using generics as it follows type safety.

Generics Syntax :

// here className can be any type of object i.e., String, List, Map or your custom class etc.

// And DataType is the type specified for the values that can be stored in that particular
data structure(here, className is that data structure).

className variableName=new className()

Generics will give you the error at compile time if you store the values other than specified data type.

Let’s take an example to understand the Generics briefly.

For ex :

void main() {
// this generic map is defined with key of int data type and value of String data type.
  var map=Map<int,String>();
  map[1]="Red";
  map[2]="Green";
  map[3]="Blue";
  map.forEach((k,v)=>print(v));
}

Output :

Red
Green
Blue

This way you don’t need any type casting or worry about any unknow data type conversion errors while you use generic structures.

What is generic Method ?

A generic method is a method that is declared with the type parameters.

Let’s take an example of generic method.

For ex :

void main(){
  int rank = 1;
  double number = 0.5;
  String value = "test";
  print("Integer Value : ");
  getDisplayValue(rank);

  print("Double Value : ");
  getDisplayValue(number);

  print("String Value : ");
  getDisplayValue(value);
}

//to make a function generic we add <T> after the name of the function. <T> stands for the type of the class like String or int or List etc. The compiler will cast the passed parameter to the appropriate base class object and let the function accept that type parameter.
getDisplayValue<T>(T result) {
    print(result);
}

Output :

Integer Value :
1
Double Value :
0.5
String Value :
test

Above function: getDisplayValue(T result) can also be replaced as below function. Object is the parent class of each class. So whatever type of parameter will you pass will be converted to the type of base class Object. So, there will be no compile time or runtime error as it is casted properly to the base class.

getDisplayValue(Object result) {
print(result);
}

In above example, we have created a generic method of Type T which can accept the parameter of type T. Here adding means that the arguments passed to the method is of Type T and is acceptable as they are also converted to the appropriate base class.

Practice this concept more and more to understand this complex and critical concept. Generics will be very helpful to achieve code reusability and code efficiency while developing bigger projects.

Feel free to ask your questions in the comment section. Keep reading and commenting your suggestions to make toastguyz a better site to learn different programming languages.

Categories
Dart

Dart Async

To understand the dart async, you must understand the type of execution flow.

There are 2 types in which the task or program can be executed.

  1. Synchronous Execution
  2. Asynchronous Execution(Async)

What is Synchronous Execution?

In general, every program you write works in a synchronous fashion.

Synchronous execution means the execution of program will work evaluating the values statement by statement(code instruction).

Synchronous Execution means the execution of program doesn’t move to the next expression until the current expression, function or block of code gets evaluated(executed).

Synchronous operation gets executed always on the main thread(A thread is a unit of program execution to evaluate or execute the block of code or program).

Each program has at least one thread to process its task or say program which is main thread.

For ex :

void main(){
	tuition();
	getDataFromServer();
	print(“End”);
}
void tuition(){
	print(“Dart Classes Ongoing”);
}
getDataFromServer(){
	//Heavy Calculation which takes around 5 seconds to execute
}

In above example, execution starts with tuition function(i.e., executes each statements or code written in the tuition). After that it evaluates the getDataFromServer() function which takes around 5 seconds to execute. Till then the Main thread gets blocked as our execution flow can’t move further to the next instruction print(“End”) until current statement or function gets evaluated completely.

This Execution will not be useful when you want to make UI changes to your application or you want to continue your execution to next statement when current statement requires heavy calculation in the program. So, to overcome this situation the concept of asynchronous execution was introduced.

What is Asynchronous Execution ?

In general, your UI runs on a single thread to interact with user which is known as main thread. Therefore all code will run on main thread which might result in poor performance due to heavy calculations or consuming operations. Till the execution of those heavy operations your UI(i.e., main thread) is blocked. So, to run those heavy operations without blocking main thread or UI asynchronous execution comes to the rescue.

Let’s understand dart async with one of the useful concept known as then keyword.

What is then ?

As the name suggests, then keyword is used to wait for the asynchronous operation to complete written in particular function. After that then block gets executed which have the Future return type retrieved from that particular function.

Let’s take an example to briefly understand async operation using then keyword.

import 'dart:io';
void main() {
// then keyword is used to perform the calculation after particular async function gets executed completely. It must have a Future return type while using with then keyword for an async function. Here, readNews() returns the Future return type String to then block.
  readNews().then((String news){
    print(news);
  });
}
// readNews() is an async function having return type of String which will be evaluated after some time in future.
Future<String> readNews() async{
  print("War Started Today !!");
  sleep(const Duration(seconds:5));
  return "War Ended !!";
}

Output :

War Started Today !!
War Ended !!

In above example, first async function readNews() gets called. After the function completion then block associated with readNews() gets called which requires the return type passed by readNews function(here, String data type).

So, we can use then keyword with async function for asynchronous operations. Await is another alternative for then block to perform smoother asynchronous operations.

What is await ?

In dart async, await is used to wait for the execution of the function completes. await keyword is prefixed before the async function call. Await keyword can only be used in async functions as well as it’s always prefixed before the async functions to wait till that async function gets executed.

So to perform async function we need to declare main function as async function. To define any function as async we need to postfix the async keyword after the function-brackets().

Let’s take an example to briefly understand async operation using await keyword.

import 'dart:io';
games() async {
  // sleep method is useful to sleep your thread for specific time duration mentioned.
  sleep(const Duration(seconds:5));
  return "Playing PUBG";
}
main() async {
  print("Playing Clash Of Clans");
//await is prefixed before the async function games
  var test= await games();
  print(test);
}

Output :

Playing Clash Of Clans
Playing PUBG

In above example, program execution waits till the games() method gets executed and after that print statement is evaluated.

so, here async operation is used as the program execution will not move forward till the async function games() doesn’t get evaluated as we have used await function. Which will wait for the current function to get executed first and then move for further execution.

this process doen’t blocking main thread to execute any operation. But, we are just waiting for the games() function to be executed which is executing on the another thread.

Let’s take another async example scenario.

Future<void> getGameDetails() async {
  var newsDigest = await gameReports();
  print(newsDigest);
}
main() {
  getGameDetails();
  playingChess();
  playingCricket();
  playingCOC();
}
playingChess() {
  print("Playing Chess now-a-days");
}
playingCricket() {
  print("Playing Cricket now-a-days");
}
playingCOC() {
  print("Playing Clash of clans now-a-days");
}
const game = 'Playing PUBG now-a-days';
const duration = Duration(seconds: 5);

// here Future<String> means the Return type of the function is String but function will be completed in future. 
Future<String> gameReports() =>Future.delayed(duration, () => game);

Output :

Playing Chess now-a-days
Playing Cricket now-a-days
Playing Clash of clans now-a-days
Playing PUBG now-a-days

In above example, first we have called async function getGameDetails(). As it is an async task it will be executing on the separate thread. After that we have called three functions playingChess(), playingCricket() and playingCOC(). They all gets executed synchronously as they are executing on main thread. The output of the aync function getGameDetails() is printed at last because that asyc method takes around 5 seconds to execute. Before that all methods gets executed so their outputs or evaluations are printed before it.

Future API represents the result of the async functions which will be processed or completed later.

When a function returns the data type with future , two things happen

  1. the function will be queued up for the execution and returns an uncompleted Future object.
  2. when the execution is finished, the future object returns with value or an error.

In above example, gameReports() method which is more complex as well as slow is queud up for the execution first and then at the end of the execution it returns the future object with string type value.

So, in this way we can perform heavy calculations without blocking main thread or UI of the program and provide smoother experience to user.

Feel free to ask your questions in the comment section. Keep reading and commenting your suggestions to make toastguyz a better site to learn different programming languages.

Categories
Dart

Dart Typedef

In dart, Typedef is a keyword used to declare alias or reference to the function in the program. With the help of this alias or reference we can call different functions having same signature(i.e., having same number of parameters with same data types). For typedef, return type does not considered as part of the function signature.

In short, typedef is used to call(refer) the different functions having the same signature assigned to typedef for smoother function manipulation.

Syntax :

// Here, parameterList stands for different types of parameters required in function.
typedef variableName(parameterList);

For ex :

// here,  SportLegends is the typedef variable which can be assigned to the different functions having same signature as declared with typedef.
typedef SportLegends(String Player1,String Player2);

// Tennis function have same signature(i.e., both String type parameters) as typedef SportLegends().
Tennis(String Player1, String Player2){
  print("$Player1 and $Player2 are two great players of tennis.");
}

// Cricket function have same signature(i.e., both String type parameters) as typedef SportLegends().
Cricket(String Player1,String Player2){
  print("$Player1 and $Player2 are two great players of Cricket.");
}

// Cricket function have same signature(i.e., both String type parameters) as typedef SportLegends().
Football(String Player1,String Player2){
  print("$Player1 and $Player2 are two great players of Football.");
}

void main(){
  SportLegends legends;
  // assigning typedef to reference the Tennis function having the same signature as typedef  SportLegends.
  legends=Tennis;
  legends("Roger Federer","Rafael Nadal");
  legends=Cricket;
  legends("Sachin Tendulkar","AB De Villiars");
  legends=Football;
  legends("Cristiano Ronaldo","Lionel Messi");
}

Output :

Roger Federer and Rafael Nadal are two great players of tennis.
Sachin Tendulkar and AB De Villiars are two great players of Cricket.
Cristiano Ronaldo and Lionel Messi are two great players of Football.

Hence, typedef becomes really useful to point-out different functions having same signature with single variable to reduce boiler-plate coding.

It can be useful to learn typedef as it makes your work very handy to map different functions with single variable as per your requirements.

Feel free to ask your questions in the comment section. Keep reading and commenting your suggestions to make toastguyz a better site to learn different programming languages.

Categories
Dart

Dart Advanced Functions

Dart functions don’t need classes for writing different functions. Which means dart treats functions as first class objects.

Dart supports advance level functions like lambda functions.

Lambda functions are a concise and efficient mechanism to represent functions with lesser code and better performance.

Syntax of Lamda :

returnType functionName(arguments) => expressions;

For ex :

game(){

/* here return type will be decided at runtime based on the value return from the function. In this case we are returning 100 so, the return type of function game is int type.*/

return 100;

}

// above code can be written as,
game()=>100;

I think this is amazing because Lambda function removes boiler plate code from your programming and optimize your work efficiency.

Lambda function with parameters

parameters passed in lambda functions do not need to specify the data type. The data type of the parameter will be interpreted based on the value passed.

For ex :

game(gameName,rank)=>"rank $rank game of the world is $gameName";
void main(){
  print(game("Minecraft",1));
}

in above example, we didn’t declare the data type for arguments. As It is optional to pass parameters for the lambda functions in dart.

In above example, gameName variable will be assigned to String data type as the value passed to parameter is “Minecraft” which is of String type.

This way lambda functions are useful for reducing the code as well as provding simplified syntax structure.

Optional parameters

Yes, dart supports optional parameters in the functions.

Optional parameters are the parameters which are not necessary to pass in the function call.

Optional parameters can have default values (if any values are not passed for optional parameters the optional parameter will have that default value we have provide in the function definition signature).

Optional parameters can be declared only after the required parameters.

There are two types of optional parameters

  1. Positional parameters
  2. Named parameters

Positional Parameters

Positional parameters are the type of optional parameters which are included inside square brackets – [ ] .

In any function, if you have declared more than one positional parameters then you have to pass them in the same order as you have defined in the function signature.

For ex :

void main(){
		// order of passing parameters is important in function call with positional parameters.
		watchMovies("An Action Movie","Star wars", 1999);
		watchMovies("An Action Movie","Terminator");
}

// watchMovies() has default int positional parameter year with value 1984. Any function call to watchMovies function without positional parameter year will be assigned default value 1984.
watchMovies(String category, [String movie, int year = 1984]){
  print(movie + " was $category released in "+ year.toString());
}

Output :

Star wars was An Action Movie released in 1999
Terminator was An Action Movie released in 1984

Named Parameters

Named parameters are the type of optional parameters which are included inside curly brackets – { } .

Named parameters are the parameters which can be passed in function call with the name we have used for that particular parameter in the function signature.

To pass named parameters in function call, you must have to use parameter name defined in the function signature.

Function calling with named parameter will be look like below,

// Here, parameterName is the name defined in function. ParameterValue will be assigned to that parameterName.
function call(parameterName : parameterValue);

For ex :

void main(){
  // Here, year and series are named parameters which are defined in the method signature of watchSeries().
 watchSeries("A Drama Series",year: 2011, series: "Game of Thrones");
}

// Any function call to watchSeries() function without named parameter year will be assigned default value 3000.
watchSeries(String category, {series, year=3000}){
  print(series + " was $category released in "+ year.toString());
}

Output :

Game of Thrones was A Drama Series released in 2011
The Walking Dead was A Drama Series released in 2010

In named parameters, you can change the order of passing the optional parameters in function calling as we did in above example.

These are some of the advance approaches available in dart functions to make your programs smoother and easy to code.

Also, dart programs can run with only functions without use of class-object structure.

This shows that how much vital role functions play in dart language. So, mastering functions in dart will help your large projects more redable.

Feel free to ask your questions in the comment section. Keep reading and commenting your suggestions to make toastguyz a better site to learn different programming languages.